17 Dorm Layout Ideas to Make the Most of Your Space
Designing a dorm room that’s functional, stylish, and cozy is one of the most exciting parts of college life. But let’s be honest—dorm rooms are notoriously small. That’s why having the right dorm layout is key to creating a space that feels both livable and uniquely yours. Whether you’re sharing a room with a roommate or flying solo, the way you arrange your dorm can make a world of difference in your day-to-day comfort.
In this article, we’re diving into 17 smart dorm layout ideas that maximize space, boost organization, and add personality to even the smallest room. These layouts blend style and practicality—perfect for anyone who wants a space that works as hard as they do.
Let’s explore the most clever dorm setups to help you feel right at home.
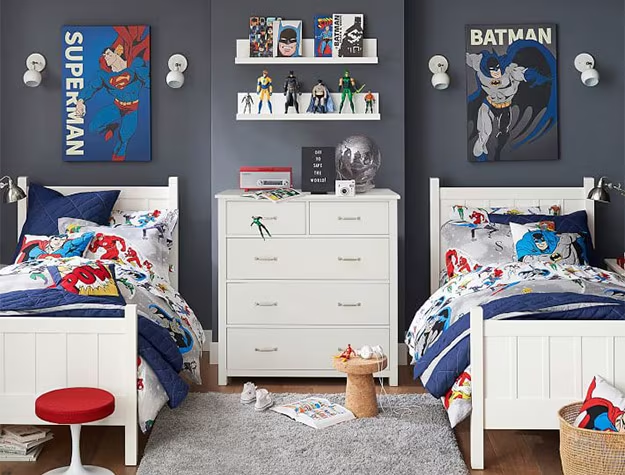
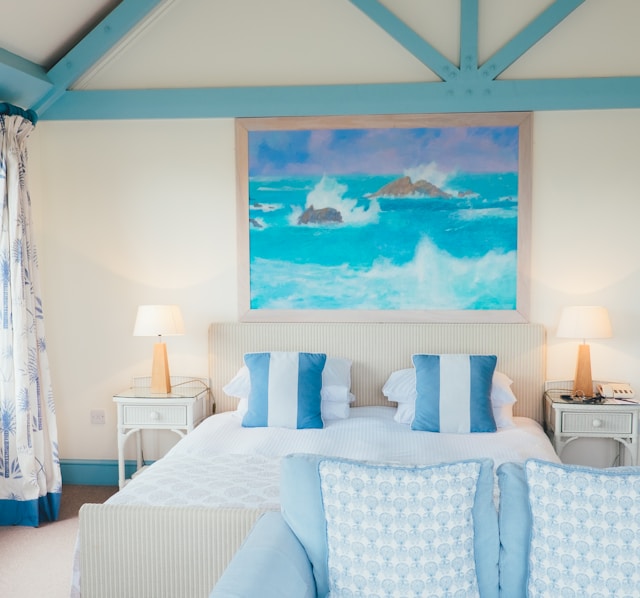
1. Side-by-Side Beds Layout
This classic layout places both beds parallel on opposite walls, creating a balanced and symmetrical room design. It’s one of the most common dorm setups—and for good reason.
With this arrangement, each roommate gets their own side of the room, which helps define personal space. You can place desks under the windows or at the foot of each bed, and use the central area as a shared walkway or lounge space with a small rug and bean bags.
This layout is perfect if you and your roommate want a more communal space without sacrificing privacy. To add a little flair, each side can be customized with personal touches like wall art, string lights, and floating shelves. Plus, under-the-bed storage is easy to access with this layout, making it a smart choice for anyone dealing with limited closet space.
Keep things cohesive with coordinated bedding or stick to your own style—it all works here. This setup is ideal for those who enjoy both independence and collaboration in their shared space.
2. L-Shaped Beds Layout
In this layout, the beds are positioned in an L-shape—one along one wall, and the other along the adjacent wall. This design naturally creates a cozy corner that feels more like a tiny apartment than a typical dorm.
The L-shape layout opens up the middle of the room, giving you extra floor space for a seating area, a small table, or additional storage. It also provides just enough separation to offer privacy without fully dividing the space. This setup works especially well in square-shaped rooms and makes it easier to have different sleeping or studying schedules without too much disruption.
With each bed tucked into its own corner, roommates can personalize their areas with headboards, throw pillows, and even privacy curtains if desired. Add corner shelves or a joint mini fridge area where the beds meet for shared use.
This arrangement brings both function and comfort, creating a dorm room that feels inviting, stylish, and open.
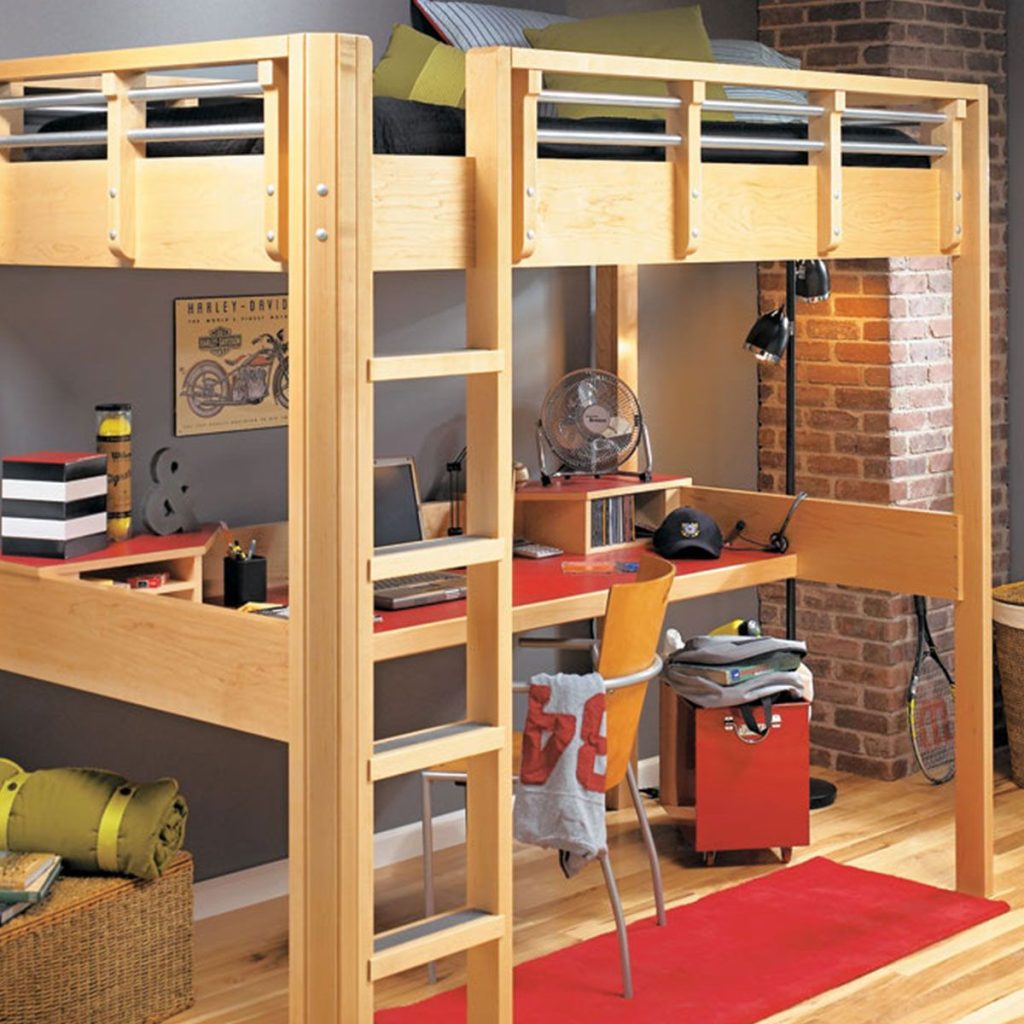
3. Lofted Bed with Desk Underneath
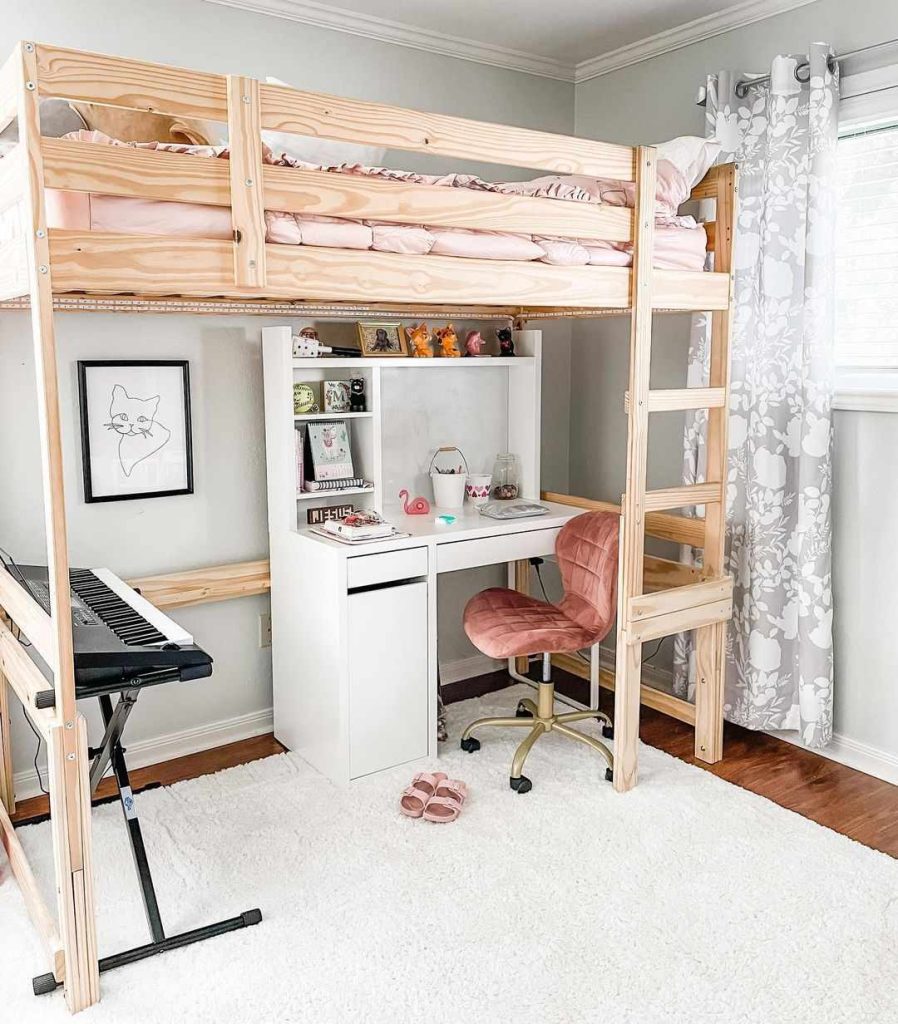
This dorm room layout is all about vertical space efficiency. By lofting your bed, you can place your desk, chair, and storage underneath, maximizing the square footage in a small room.
This setup is perfect for solo dorms or roommates who prefer to have their own independent workspaces. The desk-under-bed layout creates a defined study zone, separating your sleeping and productivity areas, which is great for maintaining focus. Add string lights or LED strips under the bed for cozy lighting while you work.
What makes this layout extra functional is the ability to customize what goes underneath. Besides a desk, you can slide in a mini fridge, bookshelf, or a comfy reading chair. It’s essentially a mini studio apartment in a dorm-sized footprint.
To prevent it from feeling too cramped, use light bedding and install clip-on lamps. A curtain can also provide added privacy, especially if your desk area becomes your go-to late-night study zone.
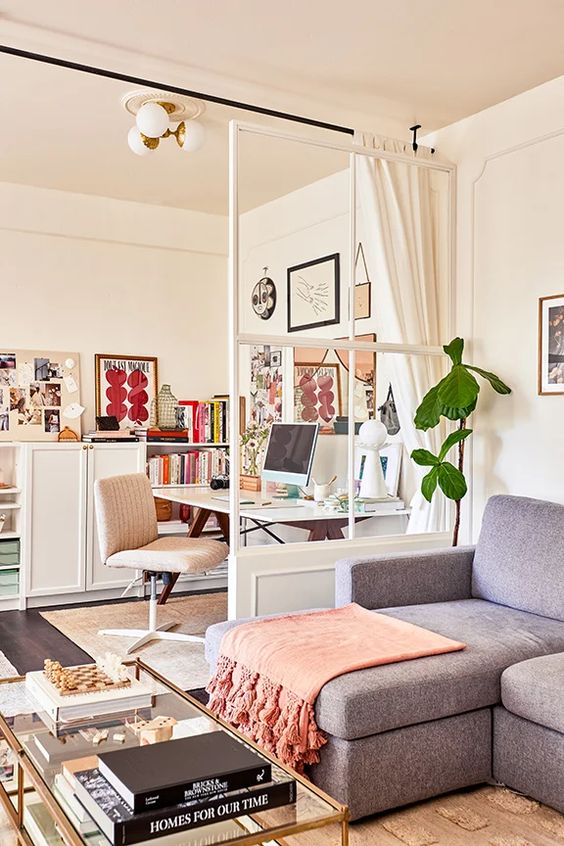
4. Back-to-Back Desks Layout
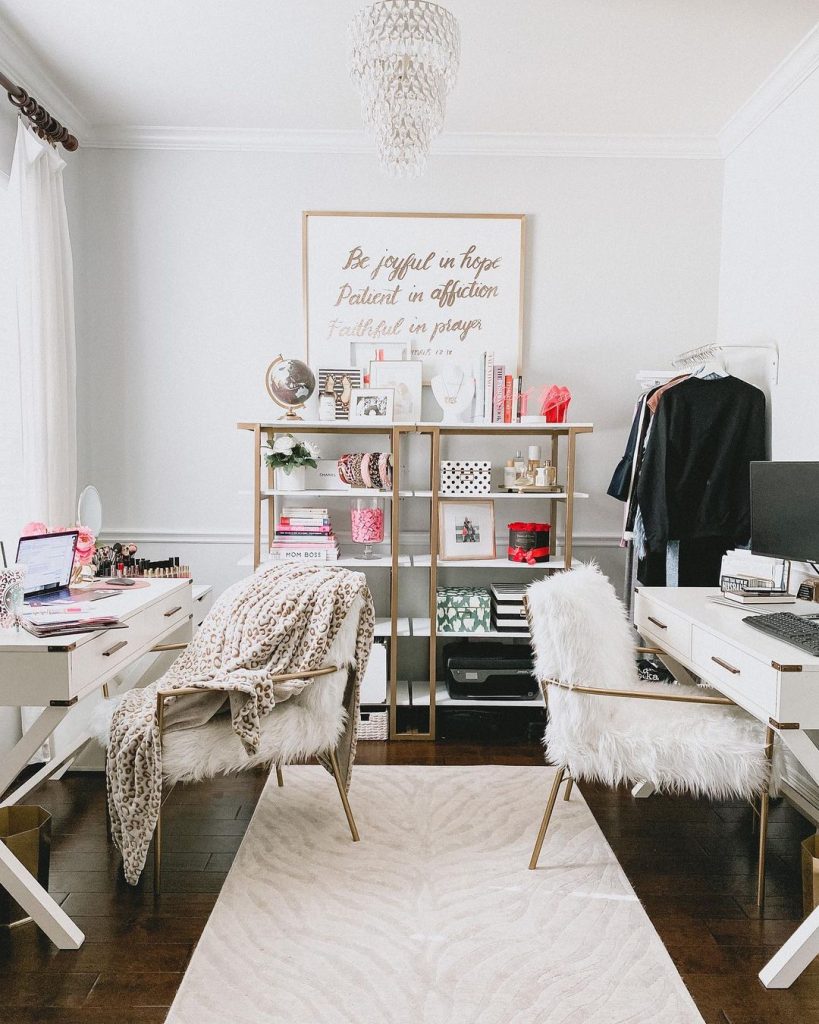
This layout is great for roommates who want a bit more personal space without dividing the room completely. Place the desks back-to-back in the center of the room, creating a dual workstation that gives both of you privacy and focus.
Beds can be positioned on opposite walls or in lofted configurations, depending on your preferences. By centralizing the desks, each roommate can maintain their own productive space while still being close enough to collaborate when needed.
This layout is especially helpful if both roommates have heavy study loads or different schedules. Use noise-canceling headphones or desk dividers for added concentration.
It also opens up the rest of the room for decorative elements—think cozy rugs, a shared bookshelf, or a cute lounge corner. Add a few plants and matching desk lamps to tie the space together visually.
5. Mirror Image Layout
Also known as the “symmetrical layout,” this setup is like looking at a reflection—each side of the room is a near-identical copy of the other. Beds are placed parallel on opposite sides, with desks directly across from each other near the foot of each bed.
It’s an excellent choice for roommates who want an equal amount of space and a visually balanced design. This layout naturally creates clean lines and makes the room feel more organized.
Storage bins, under-bed drawers, and matching wall organizers can help make the symmetry pop while staying functional. Coordinating your decor can create a harmonious vibe, or you can each style your side in different ways for contrast.
This layout also makes it easier to keep the peace—when everything is equally divided, there’s no question about whose space is whose. It’s all about fairness and flow.
6. Lofted Beds with Shared Lounge Area
Looking to create a cozy hangout spot? This layout transforms your dorm into a mini lounge. Both beds are lofted, and the space beneath each bed is left open for a shared seating area in the center.
You can place a loveseat, a couple of comfy chairs, or even floor cushions underneath the beds. Add a coffee table, string lights, and a small rug to turn the middle of the room into a college-friendly living room.
Desks can be placed on one end of the room or beneath the lofted beds if needed. This layout is ideal for roommates who love having guests over or want a laid-back vibe where they can relax, chat, or watch Netflix together.
Storage can be incorporated in creative ways—add cube organizers, rolling carts, or vertical shelves behind the seating. The key is making the space inviting and clutter-free.
It’s a great setup for social butterflies or anyone who loves a good group study session.
7. Divider Curtain Layout
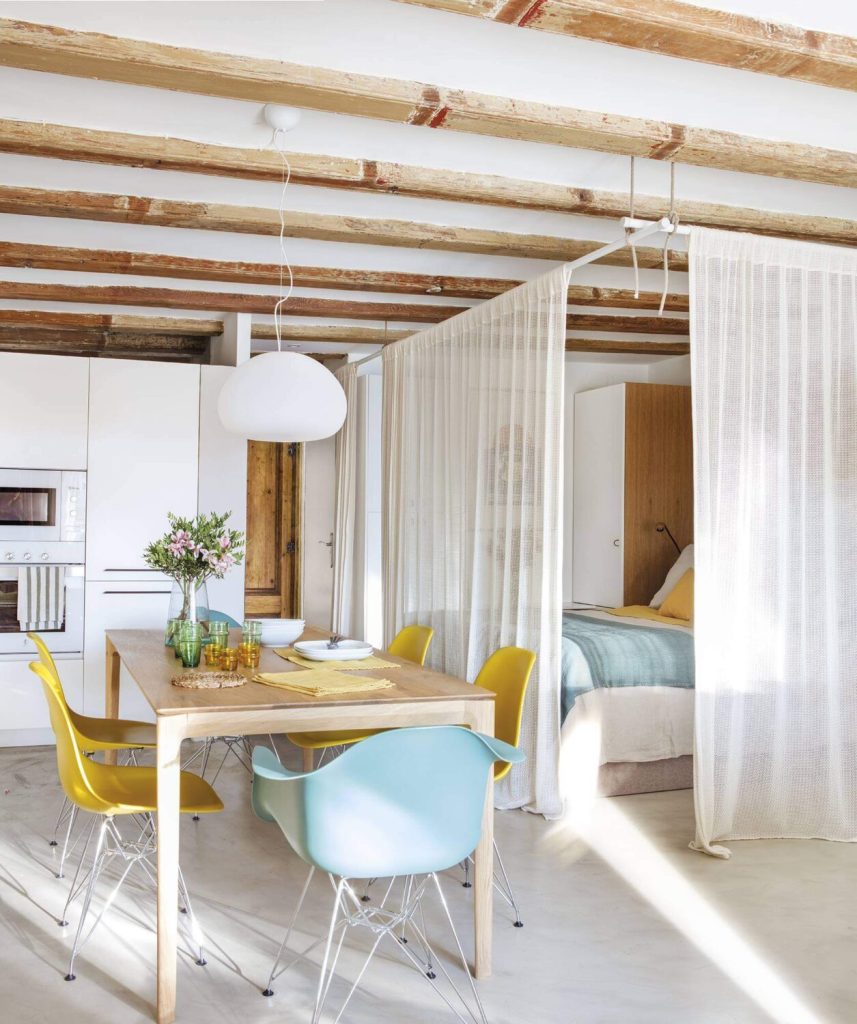
This layout gives each roommate a sense of their own private retreat. Beds are placed on opposite ends or corners of the room, with a curtain divider running through the middle.
The curtain doesn’t have to be plain—opt for a stylish fabric that matches your decor theme. Use ceiling-mounted tension rods or portable curtain dividers to keep things non-permanent (which is a must for dorm living).
This setup is ideal for light sleepers, introverts, or anyone who just needs a bit of personal space. You can even split the room by function—one side for sleeping, the other for studying or relaxing.
Desks and dressers can be arranged based on your personal routines. Add wall-mounted lighting to reduce floor clutter and open up walking space.
It’s a clever way to turn one room into two—without building walls.
8. Twin Loft + Twin Ground Layout
This layout combines one lofted bed with one on the ground, making it great for roommates with different preferences. Maybe one of you loves sleeping high up and having room underneath for a desk or storage, while the other prefers to stay closer to the ground.
This arrangement naturally divides the room into zones. The lofted bed’s bottom area can be used as a work or chill zone, while the standard bed side can focus on comfort or storage.
You’ll still have plenty of floor space to share or split as needed. Try adding a cozy reading chair, mini fridge, or even a snack station between the beds.
This layout encourages flexibility and personalization, with each roommate able to design their space based on what makes them feel most at home.
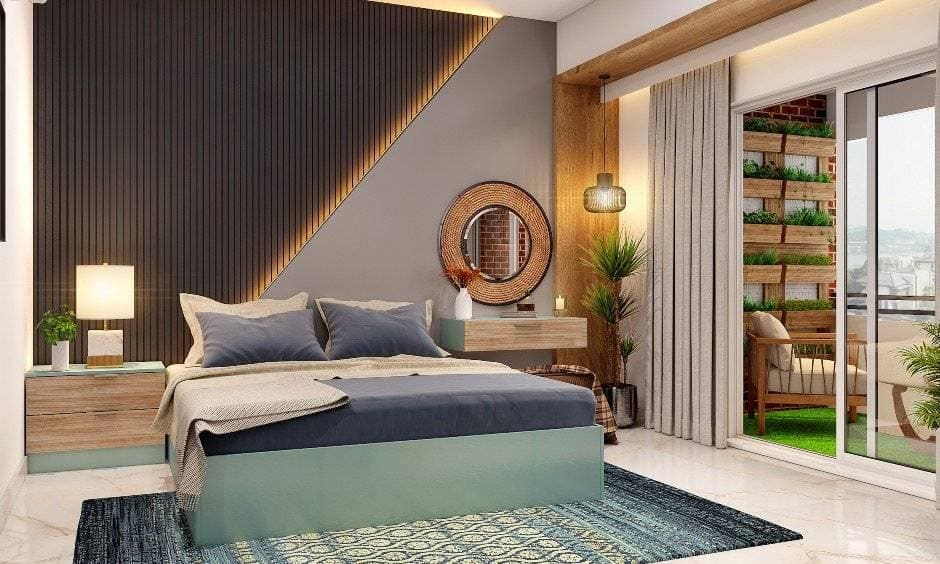
9. Beds on Same Wall Layout
Placing both beds on the same long wall is a simple yet effective way to maximize open space. This layout opens up the center of the room for shared decor, like a rug, trunk, or lounge chairs.
Desks can go on the opposite wall, facing out toward the center, which makes it feel more like a living space than just a sleeping area. You can also tuck storage units or dressers under each bed to keep things tidy and organized.
This design is ideal for narrow dorm rooms that feel cramped with more traditional layouts. By aligning the beds side-by-side, you create a streamlined look that feels open and accessible.
If you want a bit more privacy, a bookshelf or fabric screen between the beds does the trick without closing off the whole room.
It’s a great pick for anyone who wants an open feel without sacrificing function or comfort.
10. U-Shaped Layout
The U-shaped dorm layout is perfect for creating a sense of defined areas within a shared space. In this setup, the beds are placed along opposite walls, and the desks or dressers form the base of the “U” at the far end of the room.
This arrangement creates natural zones for sleeping, studying, and storing your things. The space in the center stays open and versatile—perfect for a rug, a couple of poufs, or even a shared coffee table.
The U-shaped layout works especially well in rectangular dorms. It provides visual balance and helps keep both sides of the room equally functional. Each roommate has a clear zone, and it’s easy to personalize without stepping on each other’s toes—literally or decoratively.
To elevate this setup, consider adding matching lighting or wall art to create visual flow between the different areas. And if you’re into color-coding or organizing, this layout makes it a breeze to keep everything in its place while still looking put-together.
It’s a great combo of structure and style—perfect for anyone who likes having a “home base” for each activity throughout the day.
11. Parallel Lofted Beds Layout
This layout features two lofted beds on opposite walls, with desks or dressers placed directly underneath. It’s perfect for maximizing vertical space while giving each roommate a dedicated work zone.
By lifting both beds, you free up a ton of usable floor space that’s otherwise lost. It creates a symmetrical design that’s visually clean and efficient. Plus, since each person gets their own little “bunk station,” it adds a cool, compact feel to the room.
The space beneath the beds can be styled to match your personality—whether that’s a cozy study nook, a vanity station, or extra storage with rolling carts and cube shelves. You can even add curtains or LED lights underneath for a more customized feel.
This layout is especially helpful when your room is on the smaller side but you still want to live large. It’s all about stretching the space vertically without making it feel overcrowded.
12. Desk Between Beds Layout
For a layout that encourages collaboration and a bit of shared functionality, try placing the beds on opposite walls and positioning the desks back-to-back in the center of the room.
This desk-between-beds setup allows both roommates to work side-by-side with a bit of buffer space. You can still decorate your bed and wall areas independently, but the shared desk zone brings a subtle sense of connection.
It’s also super functional if you need a spot for shared items like a printer, coffee station, or mini fridge. To keep things organized, use desk dividers or plants to provide some visual boundaries while still keeping the space open.
What’s great about this layout is that it’s easy to adapt throughout the semester—rearrange the desks to face the wall for more focus, or rotate them to create a mini classroom-style space if you’re working on projects together.
It’s all about balance and a touch of teamwork.
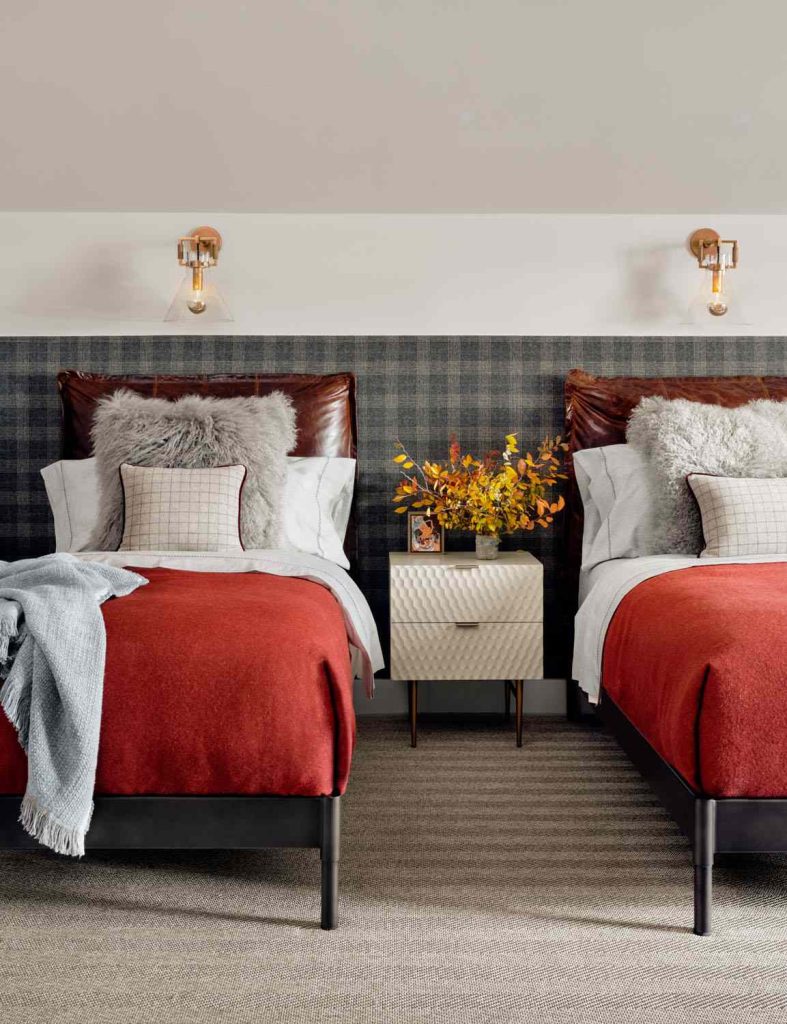
13. Corner Beds with Shared Dresser
In this layout, each bed is tucked into opposite corners of the same wall, leaving the center open for a shared piece of furniture like a dresser or storage shelf.
This configuration gives a bit of privacy while maintaining a sense of openness. The central dresser serves as both a functional and visual divider, offering extra storage and reducing clutter.
It’s ideal for roommates who like their own space but are also down to share when it makes sense. With beds nestled in the corners, you get that cozy feeling without being too far apart.
To personalize it, use decorative trays or baskets on the dresser to hold shared items—snacks, makeup, or even a cute coffee bar. Add lamps or ambient lighting to make each corner feel warm and inviting.
This layout feels structured and practical, while still leaving room for creativity and collaboration.
14. Opposite Corners Layout
The opposite corners layout involves placing each bed diagonally across the room from one another, creating the maximum amount of personal space possible in a shared dorm.
This is an excellent solution for roommates who value privacy. By using opposite corners, you’re not facing each other constantly, and there’s a sense of having your own little nook.
Desks can be placed next to each bed or centered between the two for balance. Add floor lamps, corner shelves, or even hanging tapestries to make each corner feel cozy and individualized.
This setup also helps reduce noise and light disturbance, which is perfect if you and your roommate have different class or sleep schedules.
It’s a respectful and spacious way to coexist—without sacrificing style or functionality.
15. Split Room with Cube Organizer
Need a little boundary without going full-on curtain divider? Enter the cube organizer. Place it in the middle of the room with beds on either side to instantly create zones while gaining bonus storage.
Each side of the cube can face a different roommate, with baskets, books, and essentials neatly stored in a way that doesn’t feel cluttered.
It’s one of the smartest multi-functional dorm hacks out there: a room divider, shelf, and decor feature all in one. You can style the top with plants, lamps, or framed photos to create a warm, homey feel.
This layout works especially well for visually dividing the room while keeping things light and airy. There’s still a sense of openness, but enough separation to give each person their own domain.
Simple, smart, and super customizable.
16. Diagonal Beds Layout
For a bit of a twist—literally—consider angling the beds in a diagonal layout. It might seem unconventional, but this setup can actually open up surprising amounts of space and give your dorm a unique design edge.
Position each bed in a corner at an angle, which naturally creates room for storage or seating behind the headboards. The center of the room feels more dynamic and less boxy than traditional layouts.
This setup works well with compact furniture like slim desks and rolling carts that can tuck into the unused angles. Add a cozy rug in the middle and you’ve got a stylish, slightly offbeat space that feels both functional and artistic.
If you’re someone who loves design and wants to stand out, this layout adds personality without over-complicating things.
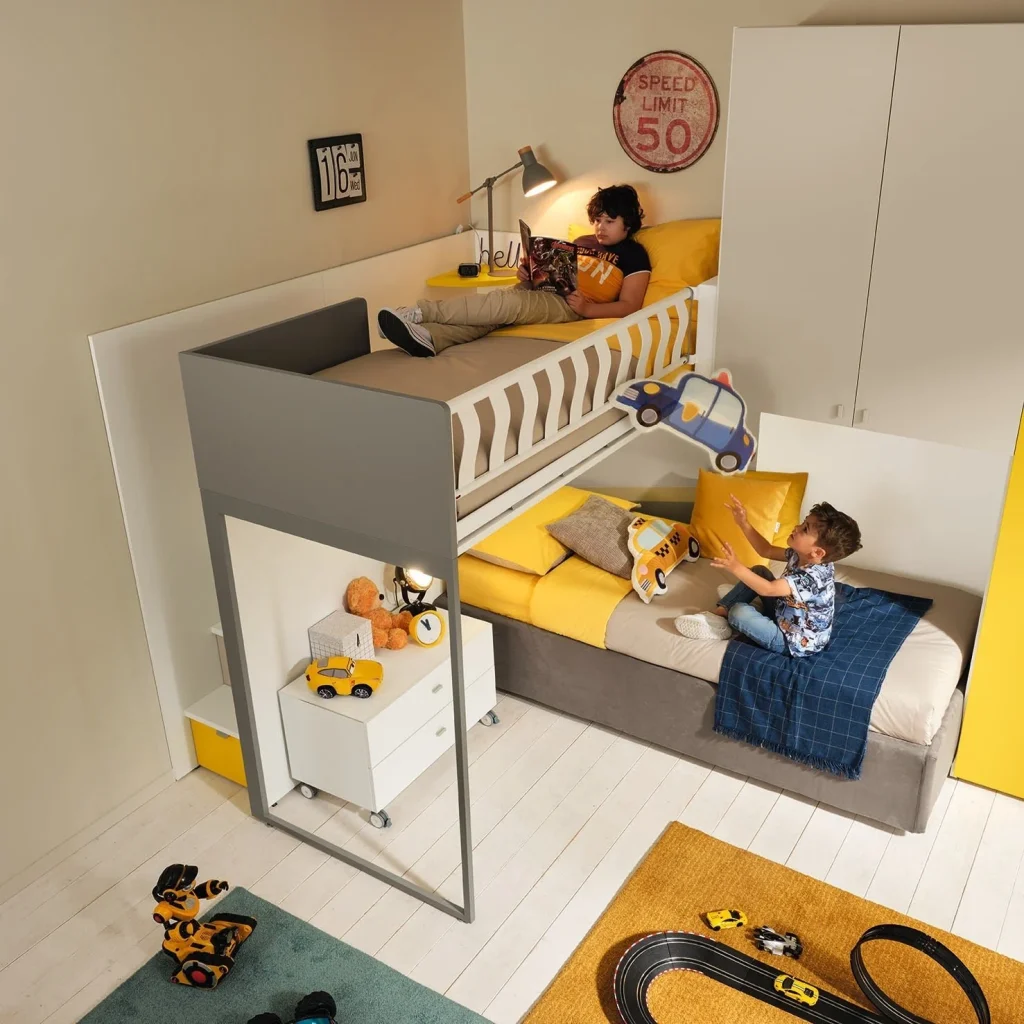
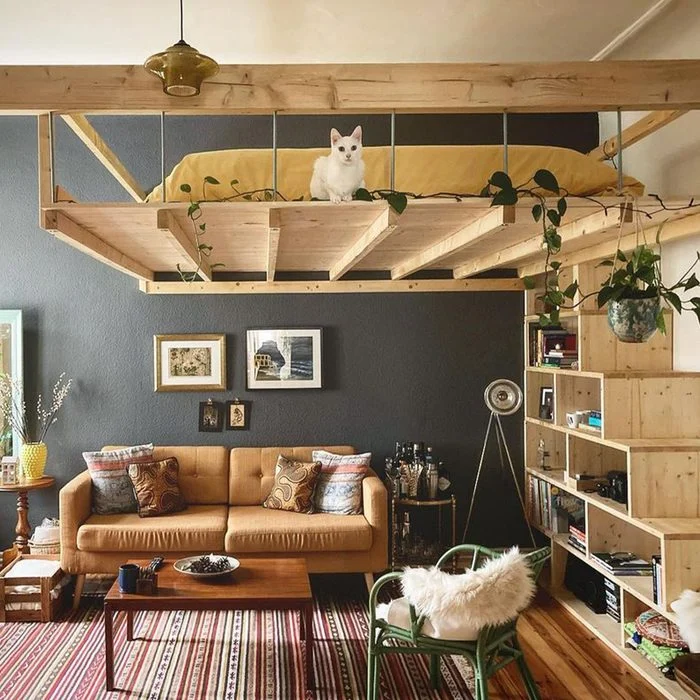
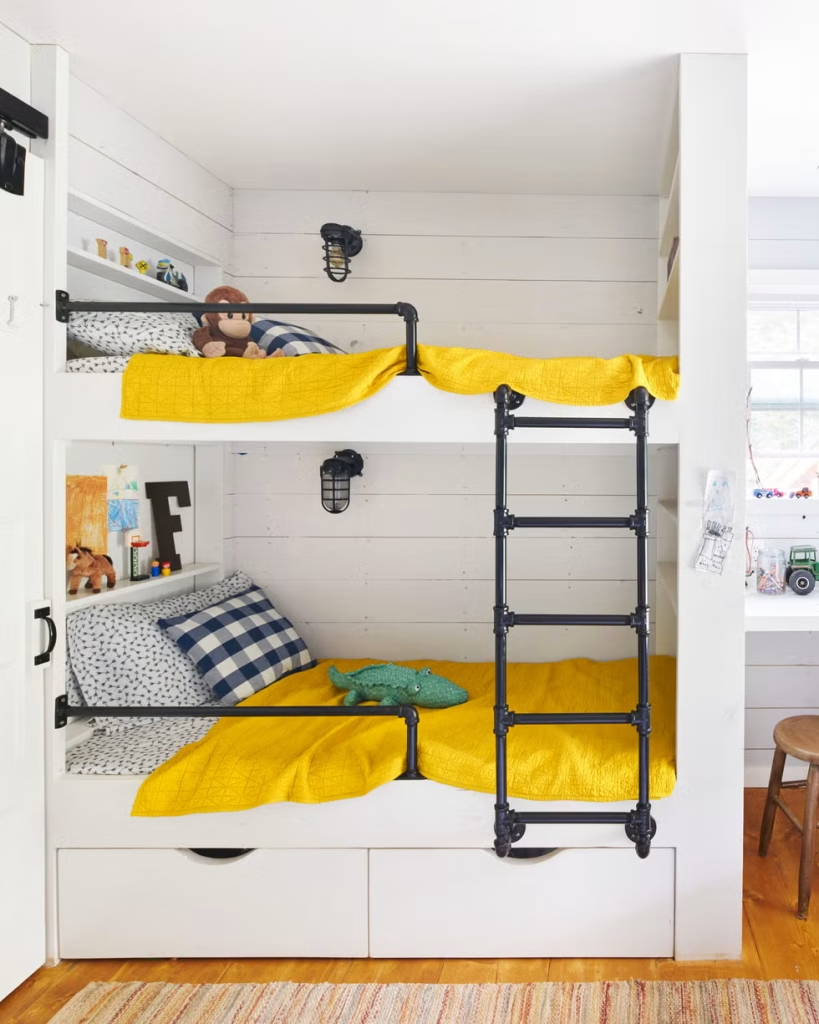
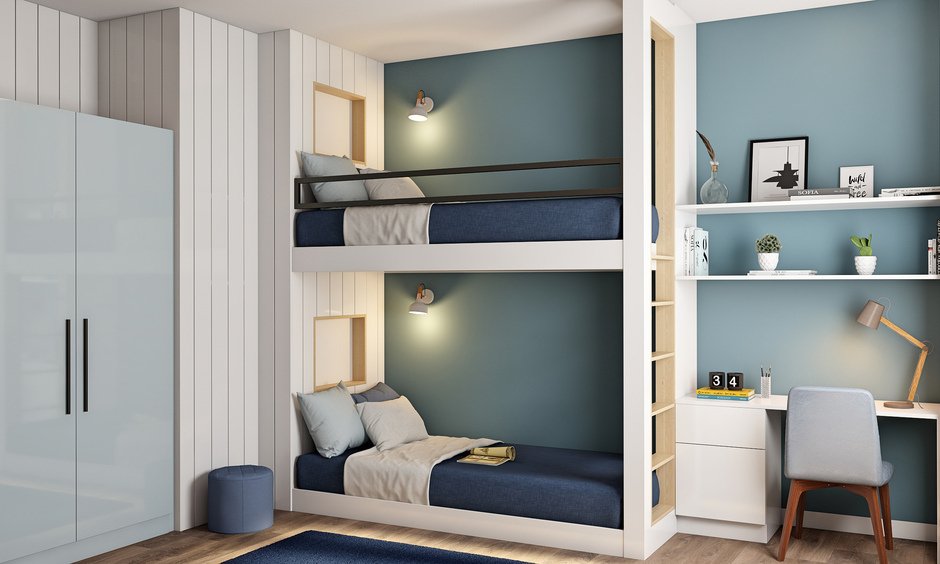
17. Bunk Beds Layout
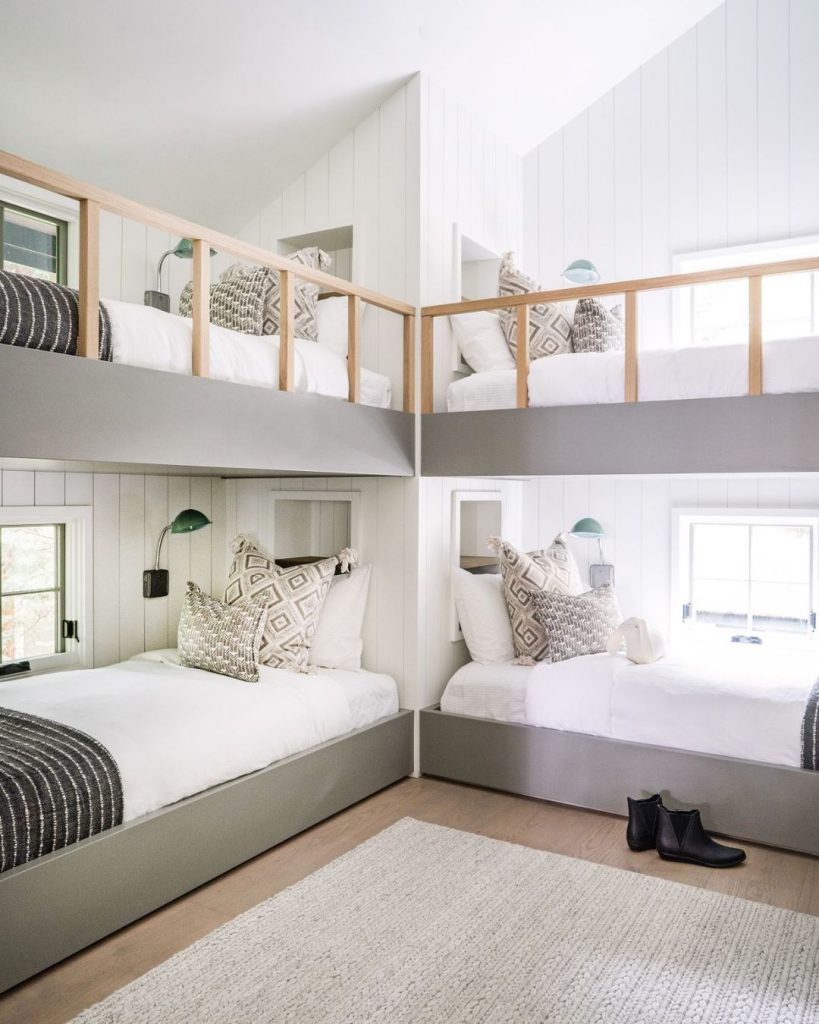
Sometimes, you just need to go vertical. The bunk bed layout is a classic space-saver, making room for extra floor space that can be transformed into a lounge zone, study area, or even a yoga mat nook.
By stacking the beds, you free up half the room instantly. That space can be shared or divided depending on your needs. Add a comfy loveseat, a small dining table, or cube storage to make the most of the extra square footage.
This layout works especially well in tight dorms or when one roommate prefers to sleep up high. Bonus points if your college dorm already comes with bunk beds that can be customized with under-bed storage, shelves, or curtains for privacy.
Just make sure to discuss preferences and rotation, so everyone gets a fair share of the top/bottom spot. Decorate the lower bunk with cozy curtains or fairy lights to create a cave-like retreat, while the top can feel more like a treehouse perch.
It’s practical, playful, and perfect for saving space without skimping on comfort.
Conclusion: Choosing the Best Dorm Layout for You
Your dorm layout is more than just an arrangement of furniture—it’s the foundation of your college living experience. From creating cozy corners to crafting shared lounges or structured study zones, each of these layouts offers a unique approach to comfort, style, and organization.
Think about how you live: Do you need quiet space to study? A social zone to hang out? Extra storage for all your stuff? Whether you’re aiming for symmetry, privacy, or all-out functionality, there’s a layout here that can transform your dorm into a place that feels like home.
Don’t be afraid to experiment and rearrange as the semester unfolds. Your needs may shift, and your space can shift with them. Add your personality through decor, lighting, and a few creative touches, and you’ll create a dorm that’s both practical and uniquely you.
Here’s to making the most of your college space—one layout at a time.